

Creating A Microsoft App
Note: You don’t need Microsoft approval for your app to work
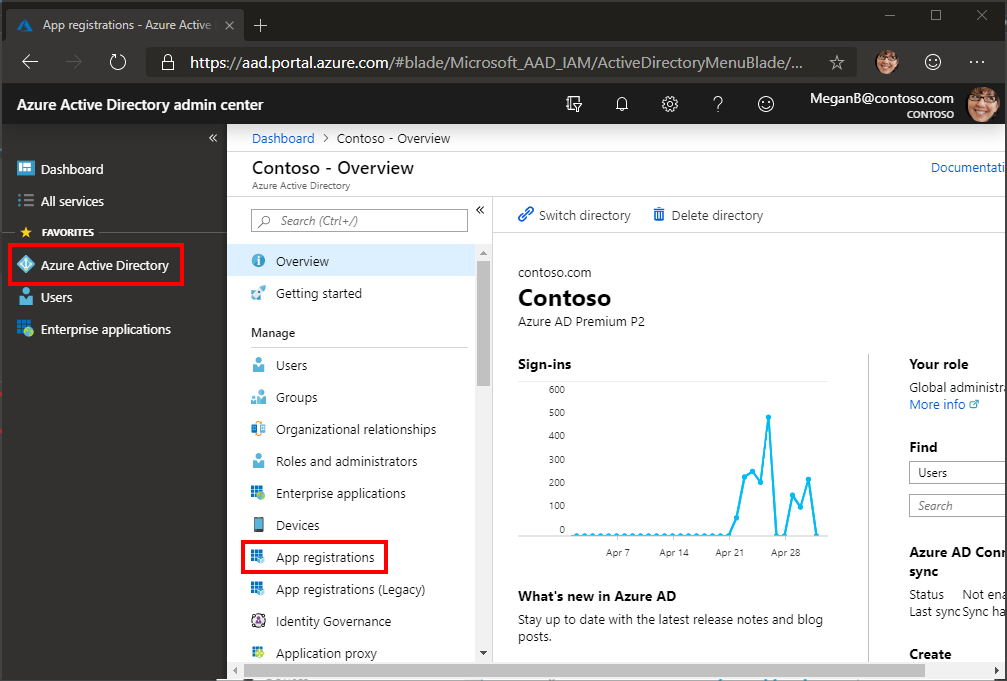
Open a browser and navigate to the Azure Active Directory admin center. Login using Microsoft Account.
- The account can be, bing, live, outlook, Hotmail, Skype, etc.

Select Azure Active Directory in the left-hand navigation, then select App registrations under Manage.
Click on “New Registration”

Fill out your app registration;
- Give your app a name
- Set Supported account types to “Accounts in any organizational directory and personal Microsoft accounts”
- Under Redirect URI/Callback URL, set the first drop-down to
Web Enter your Microsoft callback URL which should be https://yourdomain.com/callback/microsoft
Click to “RegisterApp”

Click on your app “display name”

Brand your app
- Upload your logo
- Enter your custom URL
- Enter terms of service and privacy policy URLs
- Save your changes
- Click on “Update Domain” to continue to the next page

When you click on update domain, a new pop up will appear
- Click on the “View a new domain” tab

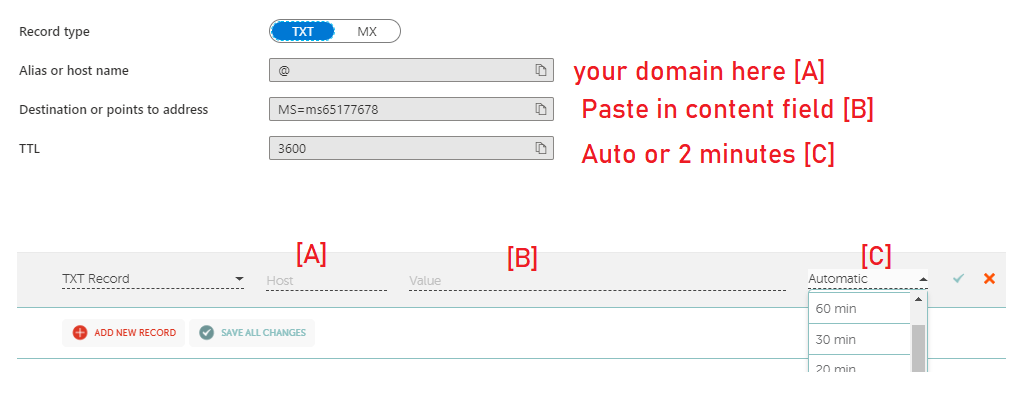
We have 2 methods of verifying these contents;
- Create a “TXT” record on your domain DNS and paste the content on the value field
- Host the .json fill

Toggle back to select a verify domain tab and click on “view custom domain names”

On the custom domain window
- Click on ‘Add Custom Domain”


To verify your domain
- Create a “TXT” or MX record
- Follow the prompt

Here is how a verified app account looks

Click on your app name to reveal your Client ID


Another required step is to make your verified domain your default app domain. To do that;
- Click on your “Display name”
- Click on “Update domain”
- Open the dropdown and select your verified domain name
- Save changes

To create your client secret;
- Click on “certificates and secrets”
- Click on new clients secret


Copy your client secret to LeadPal dashboard
While inside your LeadPal dashboard;
- Under settings
- Click on Social Apps
- Click on “New Channel”
- Select “Microsoft” from the apps “Type’
- Paste your Client ID and secret key”
- Locate your custom domain and save.

All rights reserved © LeadPal